
I showed my friend Tore the progress I was making on an HO scale structure.
Tore: “You’re scratch building!”
I looked at him and denied it. I questioned if I met the requirements. After all, I measured an existing structure to make my building. Surely HO scale modelers have strict rules that say you can’t measure an existing structure.
I compared them to quilters. Some quilters believe you can only hand-quilt. Others say it’s ok to free-motion machine quilt. Still others say you can machine embroider your quilts.
But secretly I did revel at the thought of calling myself a scratch builder. I’ve joined an elite club. Maybe I should embroider a badge.
Days passed.
I looked up the term scratch building. According to Wikipedia: “scratch building is the process of building a scale model ‘from scratch’, i.e. from raw materials, rather than building it from a commercial kit, kitbashing or buying it pre-assembled. Scratch building is easiest if original plans of the subject exist…”
I sent Tore a text: “Big news! I’m a scratch builder!
The series of photos will show the process of creating the structure and the mostly finished piece.
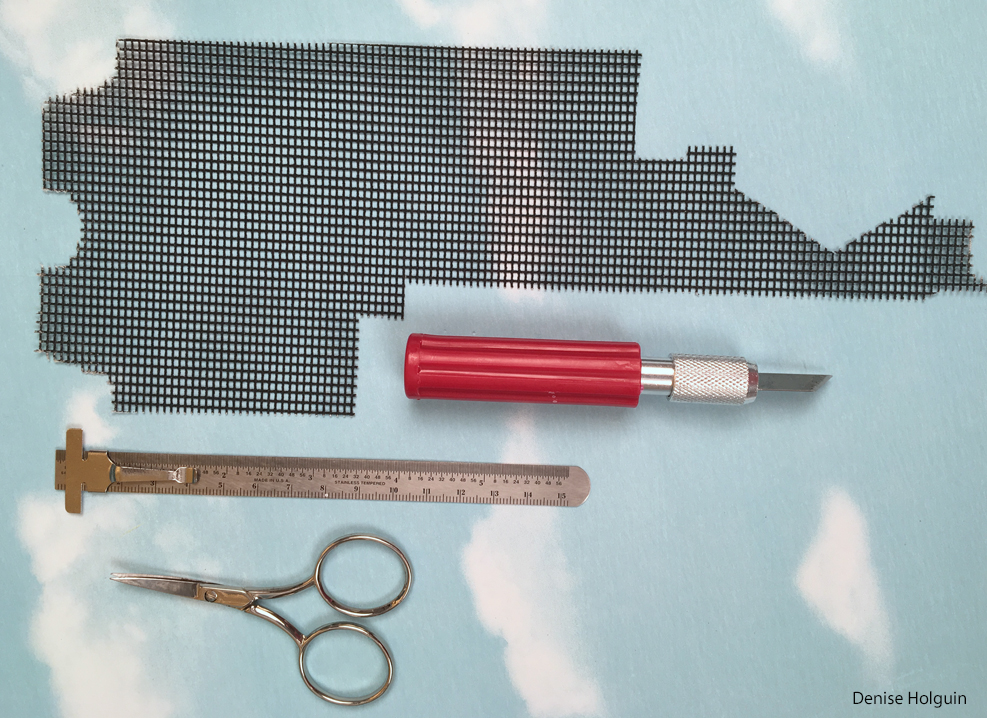
The inspiration was a piece of drywall sanding screen from a local hardware store. It’s sold by the sheet and is affordable. I sacrificed old embroidery scissors for some of the trimming and used a heavy duty knife available at hobby stores.
The drywall sanding screen reminded me of the lattice building I renovated. (The photo below is before I made renovations, but you can understand the inspiration).
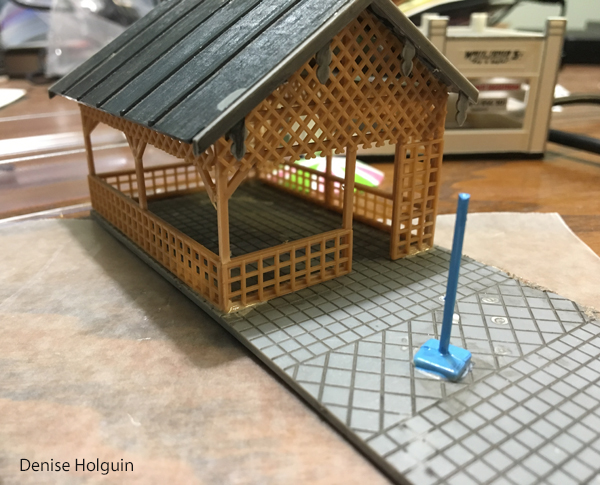
My goal wasn’t to copy the original structure. I wanted to make my own improved version. Among the improvements: a removable roof and bigger doorways and windows. These improvements will make it easier to decorate the interior.

I was happy to discover acrylic paint works on the materials. I did prime the screen before painting the tan color.

The photo below shows the original assembled structure I purchased (on the left) and my new structure on the right.

The top of the roof has decorative trim— inspired by a drive through historic downtown McKinney. If you’re unfamiliar— it’s an area with beautiful Victorian homes.

The decorative trim is the same drywall sanding screen, just cut differently. It’s a good idea to wear protective glasses when trimming because the small pieces go flying when you cut them.
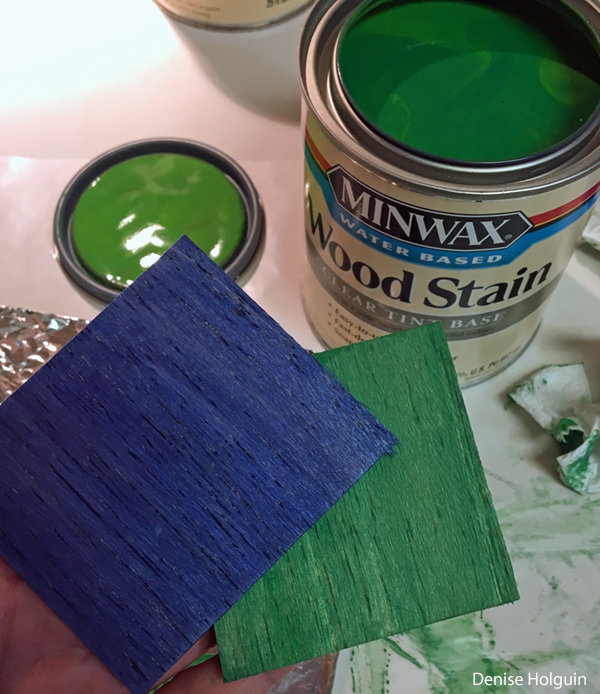
I used balsa wood for the rest of the structure, including the roof. The roof is stained green using Minwax Wood Stain. (the product also comes in blue!) The photo below shows some early experiments.
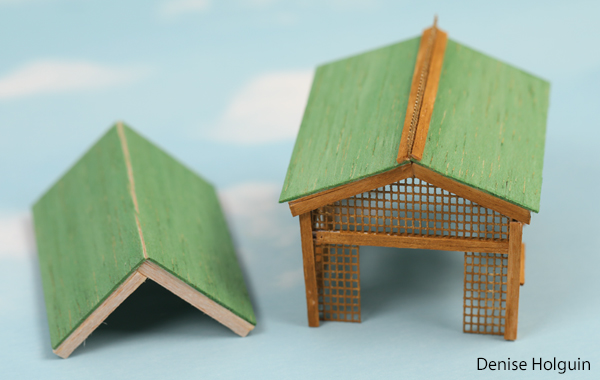
The photo below shows a mistake I made during construction. I was so engrossed in staining the roof, I forgot to double check the roof pitch. But now I have a pre-fabricated roof to sell in my HO scale Building Supply Store.
Here’s a look at the structure decked out with props: Adirondack chairs, inhabitants, an over-sized van and an interesting billboard in the background. 😉
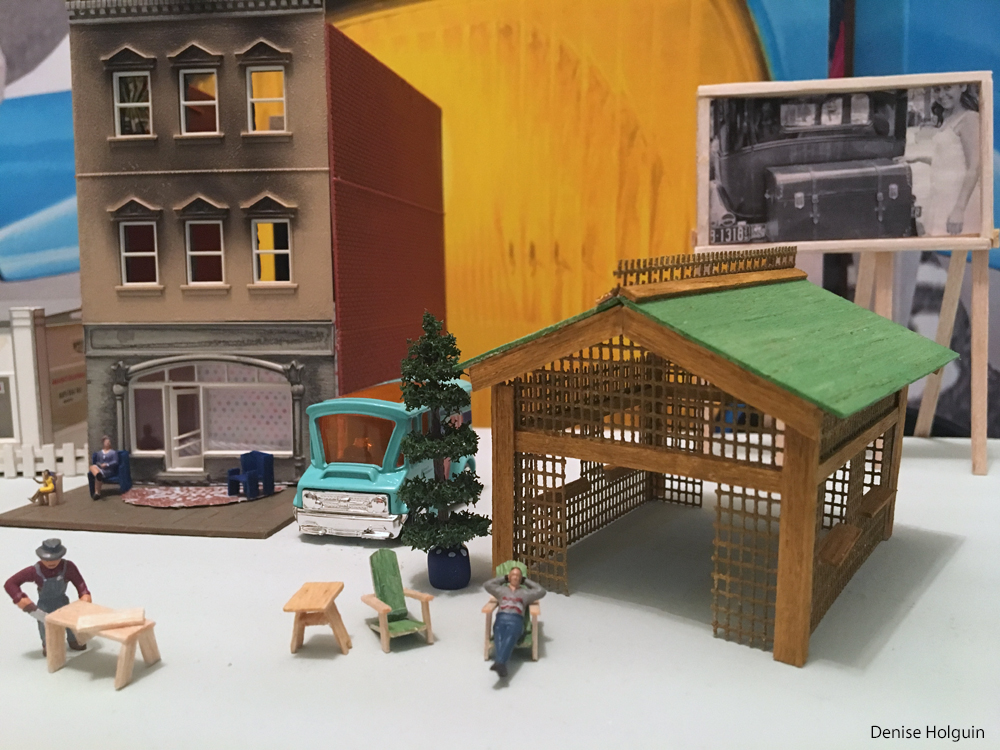
I think the building will be used as an upscale garden center.
Camera: Rockalita Sunshine (Canon EOS 5D Mark IV), iPhone
Lens: My beloved 100 mm macro lens (Canon EF 100mm f/2.8 L macro IS)
Notes: Give this hobby a try. I have proven you don’t need previous training or special skills to succeed. (I don’t even have the patience to assemble anything from IKEA). If I can do this, you can too.
